Can You Cut LED Strip Lights? A Comprehensive Guide
LED strip lights are an increasingly popular lighting solution for homes, offices, and commercial spaces. Their flexibility, ease of installation, and energy efficiency make them an ideal choice for various applications. One common question that arises is: Can you cut LED strip lights? The answer is yes, but there are specific considerations and methods to ensure the strip remains functional after cutting. In this guide, we will provide a step-by-step explanation of how to cut LED strip lights safely and effectively while maintaining their performance.
What Are LED Strip Lights?
LED strip lights consist of a flexible circuit board embedded with light-emitting diodes (LEDs). They are available in various types, including single-color, RGB, and RGBIC strips, and can be customized to fit different lengths and configurations.
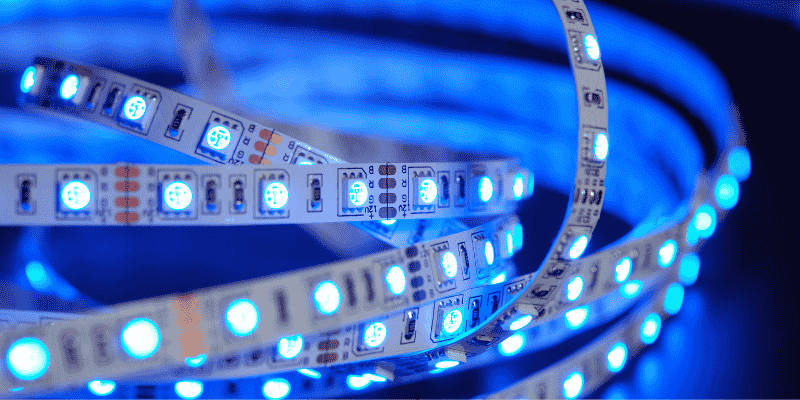
Key Components of LED Strip Lights
LED Chips: The primary light source.
Resistors: Manage current flow to the LEDs.
Copper Traces: Conduct electricity along the strip.
Cut Lines: Marked points where the strip can be safely cut.
Why Cutting LED Strip Lights Is Useful?
Cutting LED strip lights allows users to tailor the length to fit specific spaces, such as cabinets, shelves, or corners. This customization ensures an aesthetically pleasing and professional-looking installation.
Step-by-Step Guide: How to Cut LED Strip Lights Correctly
Cutting LED strip lights can be a straightforward process if done correctly. This guide provides you with clear, step-by-step instructions to ensure you achieve clean cuts without damaging the strips. Whether you're customizing the length for a specific space or creating unique lighting designs, following these steps will help you get the job done right.
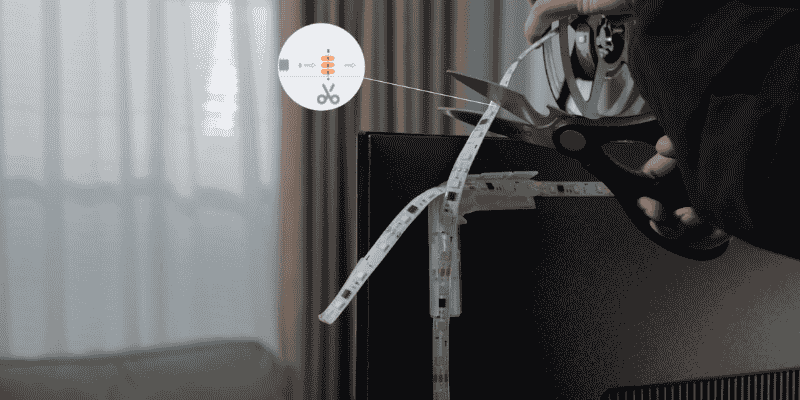
Step 1: Identify the Cut Line
Locate the marked cut lines on the LED strip. These lines are typically placed at regular intervals and are clearly visible. Cutting anywhere other than these designated points can damage the circuit and render the strip unusable.
Step 2: Gather the Necessary Tools
Sharp Scissors or Utility Knife: For clean and precise cuts.
Measuring Tape: To ensure the correct length.
Connector Clips (if reconnecting): To rejoin sections if needed.
Soldering Iron (optional): For a more secure connection.
Step 3: Make the Cut
Align your scissors or utility knife with the marked cut line. Cut straight across the line to avoid damaging the circuit board.
Step 4: Prepare the Cut Ends
Inspect the cut ends for exposed copper contacts. These contacts are essential for connecting the strip to a power source or another section of the strip.
How Do You Reconnect LED Strips After Cutting?
After cutting your LED strips, proper reconnection and powering are crucial for optimal performance and longevity. This guide provides practical, user-friendly methods to ensure your custom-length LED strips work flawlessly.
Using Connector Clips: Quick and Easy Solution
Choose the Right Clip: Select a connector clip that matches your LED strip's width (typically 8mm, 10mm, or 12mm).
Prepare the Strip End: Ensure the cut end is clean and straight. If necessary, use fine-grit sandpaper to expose the copper contacts.
Insert the Strip: Open the connector clip and carefully insert the LED strip, ensuring the copper contacts align with the clip's metal pins.
Secure the Connection: Close the clip firmly. You should hear a click, indicating a secure fit.
Test the Connection: Before final installation, power on the strip to verify the connection works properly.
Pro Tip: Apply a small amount of silicone sealant around the connection point for added durability, especially in humid environments.
Soldering for Permanent Connections: For Advanced Users
Strip Wire Ends: Strip about 1/4 inch of insulation from the ends of your connecting wires.
Tin the Wires and Contacts: Apply a small amount of solder to both the wire ends and the copper contacts on the LED strip.
Solder the Connection: Hold the tinned wire against the corresponding contact and apply heat with the soldering iron until the solder melts and joins them.
Insulate the Connection: Once cooled, cover each soldered joint with heat-shrink tubing or electrical tape to prevent short circuits.
Safety Note: Always work in a well-ventilated area and use appropriate safety gear when soldering.
Powering the Strips: Ensuring Proper Operation
1. Calculate Power Requirements:
- Determine the power consumption per meter of your LED strip (usually listed in the specifications).
- Multiply this by the total length of your strip to get the total wattage.
- Add 20% as a safety margin.
2. Choose the Right Power Supply:
- Match the voltage of your LED strip (usually 12V or 24V).
- Ensure the power supply can provide at least the calculated wattage.
3. Consider Power Distribution:
- For longer strips (over 5 meters), consider powering from both ends to prevent voltage drop.
- Use a thicker gauge wire for longer runs to minimize power loss.
4. Install a Dimmer or Controller (Optional):
- If desired, add a compatible LED dimmer or controller between the power supply and the LED strip for adjustable lighting.
Troubleshooting Tip: If you experience flickering or uneven brightness, double-check your power supply's output and consider upgrading to a higher wattage if necessary.
Common Mistakes to Avoid When Cutting LED Strips
1. Cutting Outside the Cut Line: Always cut at the designated points to avoid damaging the circuitry.
2. Neglecting Voltage Compatibility: Ensure the power supply matches the strip’s specifications.
3. Improper Reconnection: Use high-quality connectors or solder for reliable connections.
4. Exposing the Circuit to Moisture: Use waterproof strips or protective coatings for outdoor or damp environments.
Applications for Custom-Length LED Strips
Cut LED strip lights can be used in a variety of creative and functional ways:
Under-Cabinet Lighting: Provides task lighting in kitchens or workspaces.
Accent Lighting: Highlights architectural features or decor.
Entertainment Areas: Enhances ambiance around TVs or gaming setups.
Outdoor Spaces: Illuminates patios, decks, or gardens.
Releated Article:
TV Lighting Sync: Transform Your Viewing Experience with Smart Lights
Color Changing Rope Christmas Lights to Cheer the holiday
Daylight vs Bright White Light Bulbs: Key Differences
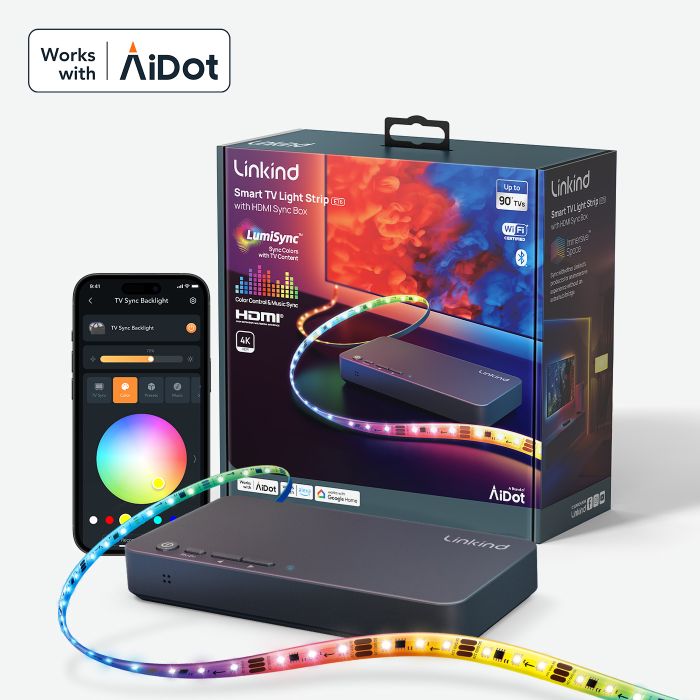
Recommend Cuttable LED Strip Lights - Linkind ET6 Smart TV Backlights with HDMI 2.0 Sync Box
The Linkind ET6 Smart TV Backlights with HDMI 2.0 Sync Box offers precision HDMI sync for accurate, lag-free lighting, easy trimming for a perfect fit, and Auto-Refill Technology for vibrant colors in letterbox formats. LumiSync™ AI ensures dynamic, seamless transitions, while 16M colors, 4 music-sync modes, and 6 presets allow full customization. Integrated with the AiDot ecosystem, it provides effortless control and an immersive smart home experience, including voice commands.
-
Precision HDMI Sync: Experience zero perceived latency and total color accuracy with true-to-life lighting that matches and enhances every scene.
-
Auto-Refill Technology: Detects black bars and refocuses on active content, ensuring vibrant and accurate colors even in letterbox formats.
-
LumiSync™ AI Technology: Automatically adjusts lighting effects with AI for seamless, dynamic transitions based on the scene, ensuring perfect color sync every time.
-
Customizable Lighting Experience: Choose from 16 million colors, 4 music-sync modes, and 6 presets to create the perfect atmosphere for any occasion.
-
AiDot Ecosystem Integration: Syncs effortlessly with AiDot products for a fully immersive smart home entertainment experience also offering easy-to-use voice control.
How to Cut and Install Linkind LED Strip Lights: A Step-by-Step Guide
Final Thoughts
Cutting LED strip lights is a straightforward process that allows for endless customization in your lighting projects. By following the steps outlined in this guide and avoiding common mistakes, you can achieve a clean, functional, and professional-looking installation. Whether you’re lighting up a cozy corner or enhancing an entire room, tailored LED strips provide a versatile and impactful solution.


