


HomeKit vs. ZigBee vs. Z-Wave: Smart Lightning Buying Guide


In This Article:
- HomeKit's Wireless Protocols: A Deep Dive
- What Is ZigBee and How Does It Work?
- What does Z-Wave do?
- Comparative Analysis of Smart Light Bulbs
- Which is the Optimal Smart Light Bulb?
In the realm of smart home automation, selecting the appropriate smart light bulb is paramount for seamless integration and optimal performance. This guide delves into the intricacies of HomeKit, ZigBee, and Z-Wave protocols, providing a detailed comparison to aid in your decision-making process. Understanding these connectivity options is essential for creating a responsive, efficient lighting system that truly elevates your smart home experience.
A smart light bulb, including Matter light bulbs, is an advanced lighting solution that allows users to remotely control brightness, color, and scheduling via a mobile app or voice assistant. By integrating these bulbs, homeowners can enhance convenience, energy efficiency, and overall control of their living spaces. The foundation of any smart lighting setup begins with choosing the right communication protocol – the invisible technology that determines how your lights connect with other devices and respond to your commands.
HomeKit's Wireless Protocols: A Deep Dive
Apple's HomeKit is a proprietary framework that enables communication between Apple devices and smart home accessories. Utilizing Wi-Fi and Bluetooth protocols, HomeKit provides a secure and user-friendly platform for home automation.
Advantages:
Enhanced Security: Emphasizes robust security measures, including end-to-end encryption and local device authentication, safeguarding user data and privacy.
Seamless Integration: Offers effortless integration with Apple devices, allowing centralized control through the Home app and Siri voice commands.
Disadvantages:
Limited Compatibility: Primarily compatible with Apple devices, which may not suit households utilizing diverse operating systems.
How to Set Up the HomeKit Protocol?
HomeKit isn't a standalone product or software; it's a comprehensive framework designed to seamlessly integrate with wireless and smart devices. When comparing ZigBee, Z-Wave, and HomeKit, HomeKit stands out for its easy setup. Below are the steps to connect your HomeKit devices to Bluetooth or WiFi and automate your smart home effortlessly.
Step 1. Prepare Your Devices
- Ensure your iPhone or iPad is updated to the latest version of iOS or iPadOS.
- Turn on Bluetooth and connect to the same Wi-Fi network as your HomeKit accessories.
Step 2. Add Accessories to the Home App
- Open the Home app on your iPhone or iPad.
- Tap the "+" icon and select "Add Accessory."
- Scan the QR code or enter the 8-digit code provided with your accessory. Some devices may also support NFC for automatic setup.
- Assign a name to the accessory and add it to a room for better organization.
Step 3. Set Up a Home Hub (Optional for Remote Access)
To control devices remotely or automate them, set up a home hub:
- Use an Apple TV, HomePod, or iPad as your hub. These devices automatically act as hubs when signed into iCloud with your Apple ID.
- For Thread-enabled accessories, ensure you have a compatible Thread border router like a HomePod mini or Apple TV 4K.
Step 4. Organize Accessories
- Group accessories by room in the Home app to control them easily with Siri.
- Create zones (e.g., "Upstairs") to manage multiple rooms together.
Step 5. Automate and Control
- Use the Home app or Siri to control devices, create automations, and schedule actions (e.g., turning lights on at sunset)
Additional Tips
- Check if some accessories require setup in their specific apps.
- Keep track of accessory codes using apps like HomePass for future reconfiguration.
By following these steps, you can efficiently set up and manage your Apple HomeKit smart home system.
What Is ZigBee and How Does It Work?
ZigBee is a wireless communication protocol designed for low-power, low-data-rate applications, making it ideal for smart home devices. Operating on the 2.4 GHz frequency band, ZigBee supports mesh networking, allowing devices to relay signals to one another, thereby extending the network's range and reliability.
Advantages:
- Scalability: Supports up to 65,000 devices on a single network, accommodating extensive smart home setups.
- High Data Transfer Rates: Offers data transfer speeds between 40 to 250 kbps, facilitating efficient communication among devices.
Disadvantages:
- Potential Interference: Shares the 2.4 GHz frequency with common devices like Wi-Fi routers and microwaves, which can lead to signal interference.
How to Set Up a Zigbee Network?
Step 1. Choose and Set Up a Zigbee Coordinator
- Select a Zigbee coordinator (hub) such as a Sonoff ZBDongle, Philips Hue Bridge, or a compatible smart home controller.
- Install the coordinator and connect it to your smart home system (e.g., Home Assistant).
Step 2. Configure Network Settings
- Set the Zigbee channel, preferably using channels 11, 15, 20, or 25 to minimize interference.
- Configure the PAN ID and network key. For security, generate a new network key.
- Adjust transmit power if your coordinator supports it.
Step 3. Add Devices to the Network
- Start with routers (mains-powered devices) to establish a strong mesh network.
- Add end devices (often battery-powered) in their final positions.
- Use the coordinator's interface to enable pairing mode.
- Follow device-specific instructions to initiate pairing.
Step 4. Optimize the Network
- Consider adding dedicated signal repeaters to extend network range.
- Use direct binding for compatible devices to improve responsiveness.
- Monitor for interference and adjust channel settings if necessary.
Step 5. Organize and Test
- Name devices and assign them to rooms in your smart home interface.
- Test each device to ensure proper connection and functionality.
Remember, building a robust Zigbee network may require some experimentation and adjustment. Start with a basic setup and expand gradually, addressing any connectivity issues as they arise.
What does Z-Wave do?
Z-Wave is another wireless protocol tailored for home automation, operating primarily in the sub-1 GHz frequency range (908.42 MHz in the US and 868.42 MHz in Europe). This lower frequency allows Z-Wave signals to penetrate walls and floors more effectively, enhancing coverage within a home.
Advantages:
Reduced Interference: The sub-1 GHz operation minimizes interference from common household devices, contributing to a more stable network.
Reliable Network: Generally considered reliable due to operating on a less crowded frequency.
Disadvantages:
Device Limitations: Supports up to 232 devices per network, which may be restrictive for larger smart home installations.
Lower Data Transfer Rates: Offers data transfer speeds between 10 to 100 kbps, which is slower compared to ZigBee.
How to Setup A Z-Wave Network?
Step 1. Choose a Z-Wave Controller
- Select a compatible Z-Wave controller (hub) such as a Hubitat C7/C8, Home Assistant with a Z-Wave dongle, or a dedicated Z-Wave gateway.
- Install the controller and connect it to your home network.
Step 2. Prepare the Controller
- Install any necessary software or add-ons for your chosen controller.
- If using Home Assistant, install the Z-Wave JS add-on and integration.
- Generate or input network security keys when prompted.
Step 3. Add Devices to the Network
- Start with devices closest to the controller and work outwards.
- Put the controller in "inclusion" or "add device" mode.
- Set the Z-Wave device to "learn" mode, usually by pressing a button.
- Keep the device within 6 feet of the controller during pairing.
- Wait for the controller to recognize and add the device.
Step 4. Configure and Organize Devices
- Name devices and assign them to rooms in your smart home interface.
- Set up any device-specific configurations or automations.
Step 5. Optimize the Network
- Install devices in their final locations.
- Run a "Network Rediscovery" or "Heal Network" function to optimize routing.
- Consider adding powered devices as repeaters to extend network range.
Troubleshooting Tips
- If a device won't pair, try excluding it first to clear any previous network associations.
- For battery-powered devices, ensure they are awake during pairing and network healing.
- If issues persist, try moving devices closer to the controller or adding repeaters.
Comparative Analysis of Smart Light Bulbs
When evaluating smart light bulbs based on these protocols, several factors come into play:
1. Installation and Compatibility
ZigBee and Z-Wave: Both protocols require a compatible hub or gateway to facilitate communication between devices. It's crucial to ensure that the smart light bulb is certified and compatible with your existing hub to avoid interoperability issues.
HomeKit: Typically does not require an additional hub, as it leverages existing Apple devices for control. However, some accessories may require a dedicated hub for extended functionality.
2. Network Range and Reliability
ZigBee: Offers a range of approximately 35 to 70 feet indoors. Its mesh networking capability allows devices to act as repeaters, enhancing coverage and reliability.
Z-Wave: Provides an indoor range of about 30 feet. While it also supports mesh networking, Z-Wave limits the number of hops (signal relays) to four, which can impact network scalability.
HomeKit: The range is contingent on the underlying communication method (Wi-Fi or Bluetooth). Wi-Fi-enabled devices offer broader coverage, whereas Bluetooth devices are limited to shorter distances.
Which is the Optimal Smart Light Bulb?
After understanding the differences between HomeKit, ZigBee, and Z-Wave, you may be wondering which is the optimal smart light bulb for your home automation system. Matter has emerged as another compelling option for building your smart lighting ecosystem, particularly when comparing Matter vs Zigbee protocols.
Users have several connectivity options when selecting smart light bulbs for HomeKit. While ZigBee has been a popular choice for years due to its mesh networking capabilities and reliability, the newer Matter standard is changing the landscape of smart home technology.
For users debating between different communication protocols, Matter light bulbs offer the best of both worlds: the reliability you expect from established protocols with the universal compatibility promised by the Matter standard.
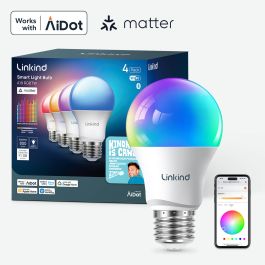
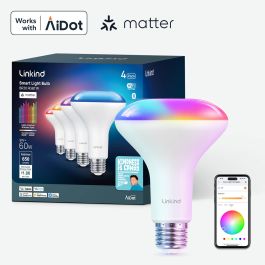
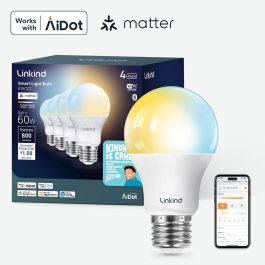
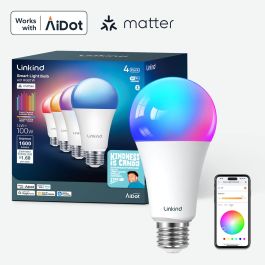
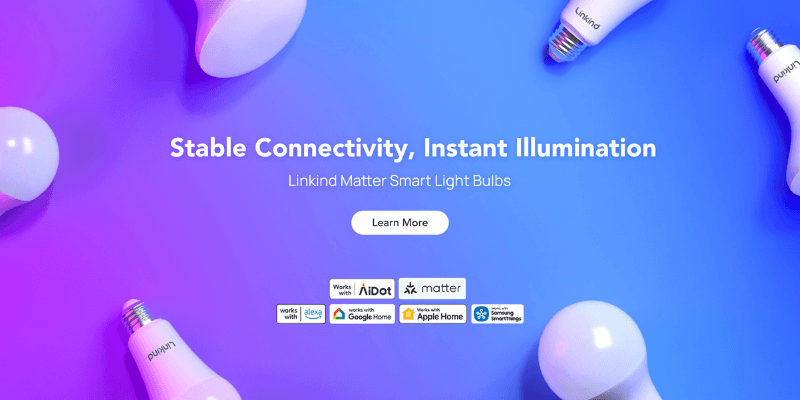
Why Linkind Matter Light Bulbs Stand Out
Linkind Matter light bulbs represent an excellent choice for users looking to future-proof their smart lighting system. These bulbs offer:
Stable connectivity - Uninterrupted control with Wi-Fi and Bluetooth dual connectivity
Matter enabled - Ensuring compatibility with multiple ecosystems
Energy efficiency - Lower power consumption than traditional bulbs
No hub required - Direct connection to your HomeKit system
Conclusion
Selecting the appropriate smart light bulb necessitates a comprehensive understanding of the underlying communication protocols. By evaluating factors such as compatibility, network reliability, security, and scalability, you can make an informed decision that aligns with your smart home objectives. Whether you opt for ZigBee, Z-Wave, or HomeKit, each offers unique advantages tailored to diverse automation needs.