Hanging Light Wire Kits: Your Ultimate DIY Guide to Stunning Pendant Lighting
In This Article:
- Why Choosing the Right Hanging Light Wire Kit Matters
- What Exactly is a Hanging Light Wire Kit?
- Must-Check Features When Choosing Your Kit
- DIY Installation: Your Step-by-Step Guide
- Creative Applications: Beyond Basic Lighting
- FAQs
Tired of cookie-cutter lighting? Imagine transforming a dull corner into a cozy reading nook or elevating your dining table with vintage hanging lights—all without hiring an electrician. While hanging light wire kits make this dream DIY reality, confusing terminology, safety concerns, and compatibility questions leave many hesitant to take the plunge. This comprehensive guide cuts through the clutter to empower your project: discover how to choose the perfect hanging lamp cord kit for your space, master step-by-step installation (even as a beginner!), unlock pro styling secrets, navigate critical safety must-knows, and get instant answers to your most pressing DIY lighting questions. Let’s replace overwhelm with confidence as we illuminate your path to stunning custom lighting.
Why Choosing the Right Hanging Light Wire Kit Matters
Before diving into your DIY pendant lighting project, understanding why kit selection is critical saves you from costly mistakes and safety hazards. Choosing the wrong hanging lamp cord kit can lead to electrical risks, compatibility headaches, or design disappointments – turning an exciting project into a frustrating experience. Let’s unpack the three most common pitfalls:
Safety Hazards: Don’t Compromise on Protection
Cutting corners with uncertified or mismatched components isn’t just risky—it’s dangerous. Here’s where DIYers often stumble:
Overloaded Cords: Using cords rated below your bulb’s wattage can cause melting or fire.
Uncertified Materials: Non-UL/ETL kits may lack flame-retardant coatings near curtains or wood.
Poor Grounding: Kits missing ground wires risk shocks, especially in damp areas.
Always prioritize UL/ETL-certified kits with clear wattage/load labels.
Compatibility Confusion: Match Components Correctly
Nothing halts progress faster than realizing parts don’t fit. Avoid these oversights:
Socket-Bulb Mismatch: E26 sockets won’t fit candelabra (E12) bulbs, and vice versa. This is especially important when using LED candelabra light bulbs, which are commonly chosen for their energy efficiency and decorative style in pendant fixtures.
Hardwired vs. Plug-In: Hardwired kits require ceiling junction boxes; plug-in kits need nearby outlets.
Box Weight Limits: Ceiling junction boxes have max weights – exceeding them risks collapse.
Pro Tip: Verify socket types and junction box specs before purchasing your pendant lamp cord.
Aesthetic Regrets: Design Matters Too
Functionality is key, but your hanging lamp cable should elevate your space – not clash with it. Common frustrations include:
Visual Dissonance: Industrial cords clashing with boho décor (or vice versa).
Fixed Lengths: Non-adjustable cords creating awkward gaps above tables or counters.
Bulky Hardware: Oversized canopies disrupting minimalist ceilings.
Solution: Measure your space and match cord textures/colors to your existing decor.
What Exactly is a Hanging Light Wire Kit?
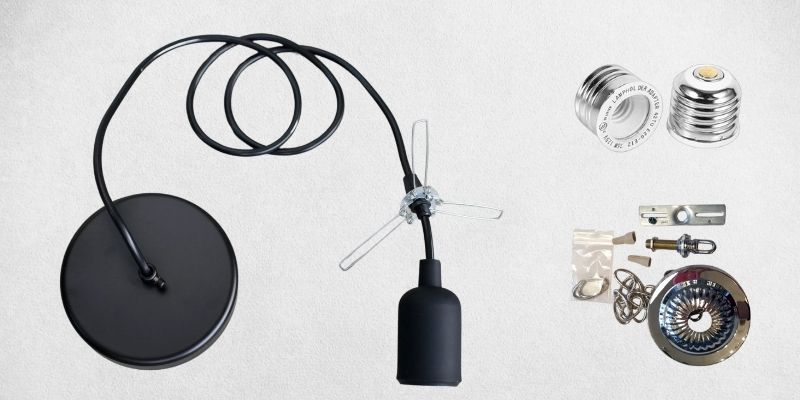
Think of a hanging lamp cord kit as your all-in-one passport to custom lighting. These DIY packages contain every component needed to transform a bare bulb into a suspended masterpiece – no electrical expertise required. Whether you're crafting a single statement piece or a clustered installation, understanding these four core elements ensures you'll build safely and stylishly:
The Cord/Cable: Your Lighting's Lifeline
More than just a wire, your pendant lamp cord balances safety and style while delivering power. Key options include:
Braided Fabric: Cotton or nylon wraps for boho/industrial vibes (avoid moisture-prone areas).
Clear Rubber: Nearly invisible discretion for modern spaces.
Vinyl-Coated: Water-resistant protection for kitchens/bathrooms.
Pro Tip: Braided cords add texture but reduce flexibility – measure turns carefully!
The Socket: Where Bulb Meets Connection
This critical component determines both function and aesthetics. Choose based on your bulb type:
E26 Sockets: Standard base for most A19/LED bulbs (common in living/dining rooms).
E12 Sockets: Smaller "candelabra" base for vintage/chandelier bulbs.
Elevate Your Experience with Smart Bulbs
While any compatible bulb works with your pendant kit, smart bulbs transform functional lighting into an immersive experience. Imagine adjusting your pendant's ambiance from "sunrise meditation" to "midnight productivity" without leaving the couch.
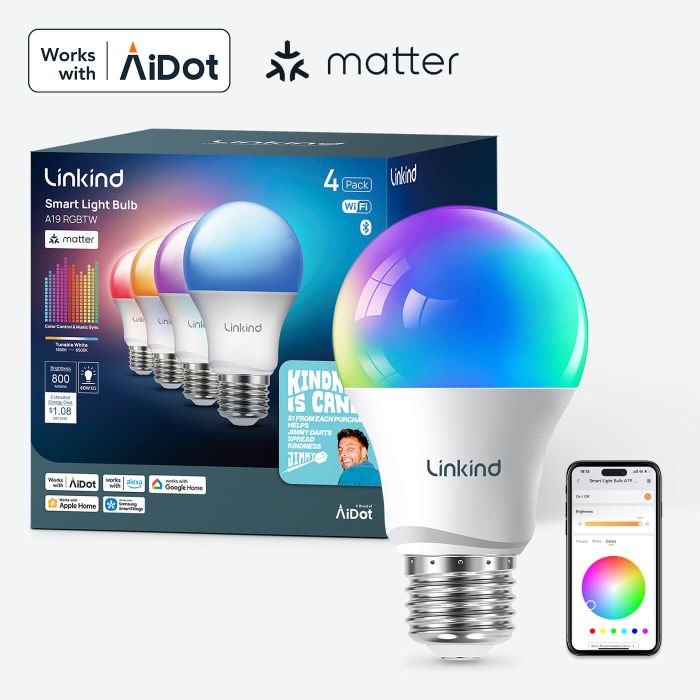
Featured Product: Linkind A19 Matter Smart RGBTW Bulb
Why DIYers Love It:
Scene Mastery: Instantly switch between 104 preset moods - from "cozy reading" amber to "creative focus" daylight
Beat-Driven Brilliance: Lights pulse to music in sync mode (unified colors) or async (disco-party mode)
Universal Control: Works with Apple/Google/Amazon/Samsung via Matter - no app juggling
True-Color Technology: 90+ CRI reveals your decor's authentic hues at any brightness
Dual Connectivity: Wi-Fi for remote access + Bluetooth backup during outages
-
Seamless & Stable Connectivity: Linkind smart bulbs feature dual Wi-Fi/Bluetooth for reliable control anywhere. Wi-Fi enables remote access; Bluetooth serves as backup. Quick 5-second reconnection after outages.
-
Matter-Enabled: Matter-compatible bulbs work with Apple, Google, Amazon & Samsung ecosystems. Control all from one app—schedule, dim, and create scenes easily.
-
Sync Lights to Music: Transform spaces with two sync modes—synchronized for uniform beat-matching or asynchronous for multi-color displays that respond independently to music.
-
Scene Modes: 104 presets and 16 million colors give complete creative control. Personalize any space with one tap for movies, gaming, or relaxation.
-
True-to-Life Colors: CRI 90+ ensures rich, natural tones. Adjust from warm 1,800K to crisp 6,500K daylight, or explore endless color options for any mood.
Hardware: The Invisible Support System
Often overlooked, these pieces ensure secure, polished installations:
Canopy: Ceiling cover disguising wires and junction boxes.
Mounting Plate: Anchors the fixture to electrical boxes.
Hardware Kit: Screws, nuts, and washers for assembly.
The Secret to Professional-Grade Results
Cheap sockets create flickering frustration. Premium components ensure your pendant not only looks stunning but performs reliably for years.
Featured Product: Linkind E12 Candelabra LED Bulbs
Ideal for Vintage/Bohemian Kits:
Vintage Aesthetic: Exposed filament design complements braided cords
Seamless Dimming: Glide from 10%-100% without flickering or buzzing
Compact Power: Fits tight pendant shades while outputting 500lm
Eco-Smart: Uses 85% less energy than incandescent
Eye Comfort: 2700K flicker-free glow prevents headaches
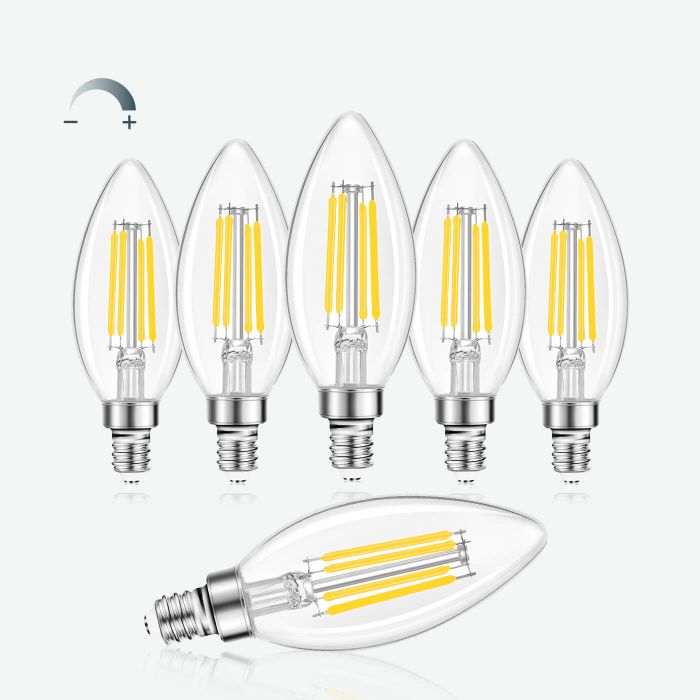
- Smooth Dimming: Linkind E12 Candelabra Led bulbs offer seamless dimming from 10% to 100%, compatible with most dimmers. UL Listed and FCC certified for quality.
- Energy Efficient: Equivalent to 60W incandescent bulbs, these LED candle lights reduce electricity usage by 85%, with a 15,000-hour lifespan.
- Exceptional Illumination: Emitting 500 lumens of soft white light at 2700k, these bulbs provide flicker-free and glare-free illumination.
- Vintage Style, Superior Quality: Featuring an E12 LED bulb base, these bulbs offer vivid color rendering with CRI80+ and a 320-degree beam angle.
Plug-in vs. Hardwired: Power Source Flexibility
Your choice here defines installation freedom and permanence:
Plug-in Kits:
- Connect to wall outlets
- Ideal for renters or temporary setups
Hardwired Kits:
- Directly wire to ceiling circuits
- Permanent solution for owned homes
- Tip: If you're converting an old recessed can light into a hanging fixture, recessed can conversion kits provide a seamless bridge—making hardwired installations both safe and stylish.
Must-Check Features When Choosing Your Kit
Selecting the perfect hanging light wire kit isn’t about luck – it’s about strategic evaluation. Overlooking these critical elements leads to safety risks, installation headaches, or design disappointment. Arm yourself with this checklist to transform confusion into confidence:
Certifications: Your Non-Negotiable Safety Shield
Never gamble with uncertified electrical components. Prioritize:
UL/ETL Marks:
• Independent testing for fire/electrical safety
• Ensures flame-retardant materials
Damp/Wet Ratings:
• "Damp-rated" for humid rooms (bathrooms)
• "Wet-rated" for direct exposure (outdoor covered patios)
Red Flag: Kits without certifications risk home insurance voids.
Weight & Wattage Ratings: Avoid Structural Disasters
Exceeding limits causes sagging cords or ceiling damage. Verify:
Standard Kits:
• Max 6.6 lbs (3kg) fixture weight
• Supports ≤60W incandescent or 100W-equivalent LEDs
Heavy-Duty Kits:
• Required for glass/metal shades
• Look for "industrial-grade" or "commercial-rated" labels
Critical Check: Add 20% to your fixture’s weight for safety buffer.
Length Flexibility: Nail Your Hanging Height
Awkwardly hovering lights ruin ambiance. Follow these guidelines:
Counter/Table Heights:
• 24"-36" clearance from surface
• Prevents glare while illuminating tasks
Floor-Level Pendants:
• 60"-72" for reading nooks
• 78"+ for hallway walkways
Adjustable Kits:
• Slide-to-lock mechanisms
• Trim-and-rewire options
Pro Tip: Add 12" to your ideal length – you can always shorten, never extend!
Feature Comparison Cheat Sheet
Still feeling overwhelmed? This at-a-glance table distills everything you need to match kits to your specific scenario. Use it as your pocket guide while shopping or comparing options online:
|
Feature |
Ideal For |
Red Flags |
|
Braided Cords |
Dry living/dining rooms |
Unsealed ends in fabric |
|
Rubber/PVC Cords |
Kitchens/bathrooms |
PVC odor (indicates toxins) |
|
E26 Sockets |
Main lighting |
"One-size-fits-all" claims |
|
UL/ETL Certification |
All installations |
Missing certification marks |
|
60"+ Lengths |
Statement pendants |
Non-trimmable cords |
DIY Installation: Your Step-by-Step Guide
Congratulations – you've selected the perfect hanging light wire kit! Now, let's transform that box of components into stunning illumination. This foolproof 5-step process demystifies installation for beginners while incorporating pro electrician tips. With basic tools and careful attention, you'll complete this project in under 30 minutes. Remember: Working with electricity demands respect, not fear.
Essential Tools Checklist:
Voltage tester (non-negotiable safety item)
Screwdriver (Phillips/flathead based on hardware)
Wire strippers (for trimming/customizing cords)
Ladder (stable, height-appropriate)
Step 1: Safety First – Electrify Your Awareness
Never skip this step – 47% of electrical accidents occur during DIY installations. Prepare your workspace:
Cut Power at Source:
- Switch OFF the circuit breaker controlling the room.
- Place a "DO NOT TOUCH" note on the breaker panel.
Verify Zero Voltage:
- Test all ceiling wires with your voltage tester.
- Confirm no current flows before touching wires.
Pro Tip: Use a non-contact voltage tester – it lights up/sounds if current is present.
Step 2: Mount the Ceiling Canopy – Build Your Foundation
This "invisible" hardware ensures professional-looking results. Follow systematically:
Secure Mounting Bracket:
- Align bracket holes with junction box screws.
- Tighten until firmly anchored (no wobbling!).
Thread the Cord:
- Feed your hanging lamp cablethrough the canopy center.
- Leave 6-8" of slack above the canopy for wiring.
Watchpoint: Metal junction boxes? Use plastic anti-short bushings on threaded entries.
Step 3: Wiring the Socket – The Critical Connection
Here’s where plug-in and hardwired kits diverge:
For Plug-in Kits:
Skip to Step 4 – your socket comes pre-assembled!
For Hardwired Kits: Connect Color-to-Color
- BLACK (live): Black ceiling wire (use wire nut)
- WHITE (neutral):White ceiling wire
- GREEN (ground):Bare copper/green ceiling wire
Insulate & Organize:
- Wrap each connection with electrical tape over the wire nut.
- Neatly tuck wires into the junction box.
Critical Check: Tug-test each connection – wires shouldn’t detach when gently pulled.
Step 4: Secure the Socket & Customize Length
This step brings your pendant to life:
Socket Attachment:
- Connect cord wires to socket terminals (usually pre-soldered).
- Secure socket housing with included screws.
Adjust Cord Length:
- Slide canopy flush against ceiling.
- Trim excess cord with wire cutters only if kit allows.
- For non-trimmable kits: coil excess inside canopy.
Trim Smart: Leave extra length if future adjustments might be needed (e.g., changing table height).
Step 5: Install Bulb & Power Test – The Grand Reveal
Time for validation:
Bulb Selection:
Insert ≤60W LED bulb (cooler and more efficient than incandescent).
Restore Power & Test:
- Turn breaker back ON.
- Flip light switch – celebrate that first glow!
Final Adjustments:
Fine-tune hanging height by adjusting cord at canopy.
Performance Check: If light flickers, recheck Step 3 connections or test socket with another bulb.
Critical Safety Reminder
NEVER compromise on two rules:
Wattage Limits: Exceeding bulb wattage melts sockets and starts fires.
Heat Proximity: Keep cords ≥3 feet from heaters, stoves, or fireplaces.
When in doubt, consult a licensed electrician – your safety is worth the investment.
Creative Applications: Beyond Basic Lighting
Your hanging light wire kit isn’t just a functional tool—it’s a design superpower. By reimagining how, where, and why you suspend lighting, these versatile kits transform ordinary spaces into curated experiences. Forget cookie-cutter fixtures; explore these four visionary techniques to elevate your home’s aesthetic narrative:
Cluster Magic: Dynamic Group Installations
Create jaw-dropping focal points by grouping multiple kits:
Dining Table Drama:
- Hang 3–5 pendants at staggered heights (6"–10" variance)
- Use identical cords + varied bulb shapes (globes, teardrops)
Kitchen Island Brilliance:
- Align 3 kits linearly over countertops
- Match cord colors to cabinet hardware for cohesion
Bohemian Vibes: Textured & Tactile Energy
Channel carefree elegance with earthy materials and warm glows:
Material Pairing:
- Braided hanging lamp cords(jute, cotton) + vintage Edison bulbs
- Add macramé sleeves or wooden beads to cords
Asymmetrical Play:
- Hang single pendants off-center in reading nooks
- Drape cords loosely vs. taut lines for "unfinished" charm
Smart Lighting Takes Creativity Further
While Edison bulbs offer vintage charm, smart bulbs unlock dynamic possibilities. Picture your clustered pendants shifting from energizing cool white during work hours to warm romantic hues at dinner - all automated.
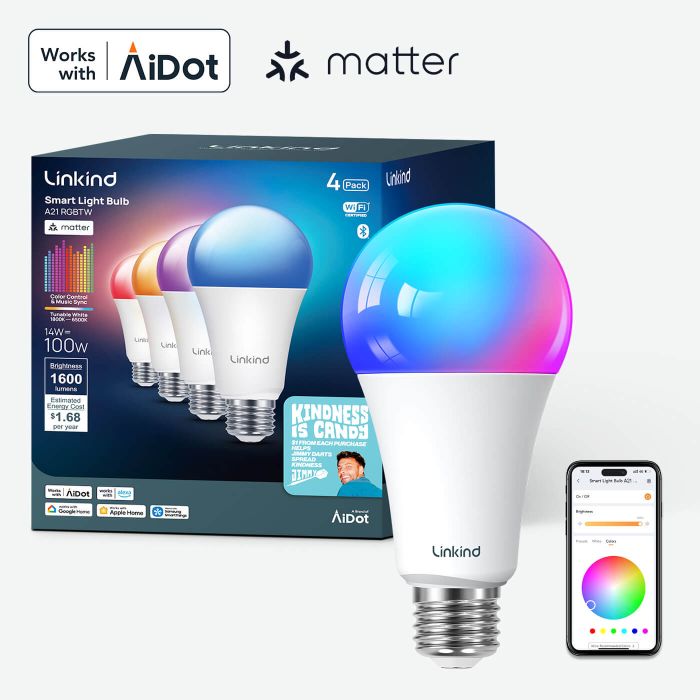
Featured Product: Linkind A21 Matter Smart RGBTW Bulb
Perfect For Statement Pendants:
High-Output Brilliance: 1100 lumens illuminate larger spaces like dining rooms
Set & Forget: Schedule color changes to match your daily rhythm
16 million Hues: Match cords to bulb colors (try black cords with deep purple)
Instant Recovery: Reconnects in 5 seconds after power blips
One-Tap Atmospheres: "Movie Night" mode dims all pendants simultaneously
-
Failproof Dual Connectiv: Dual Wi-Fi/Bluetooth technology ensures control anywhere. 5-second reconnection after outages keeps smart lighting always responsive.
-
Universal Smart Home Integration: Matter compatibility connects with Apple, Google, Amazon & SmartThings from one platform. Control all smart lighting without switching apps.
-
Music-Reactive Lighting System: Two sync modes transform spaces: Synchronized for uniform color pulsing or Asynchronous for vibrant multi-color displays that follow your beat.
-
Infinite Atmosphere Creator: 104 preset modes and 16 million colors let you instantly transform any space. Perfect ambiance for movies, gaming or relaxation with one tap.
-
Professional-Grade Color Fidelity: 90+ CRI delivers true-to-life colors that pop in any setting. Adjust from warm 1800K to crisp 6500K or explore endless custom color options.
Uplight Plants: Botanical Spotlighting
Turn your fiddle-leaf fig into a living sculpture:
Waterproof Solutions:
- Use damp-rated pendant lamp cords(PVC/rubber) near plant misters
- Position 18"-24" above large foliage for shadow play
Functional Art:
- Suspend kits inside empty planters for uplighting magic
- Choose green cords to "disappear" against stems
Minimalist Lines: Sculptural Simplicity
Less is more—when executed precisely:
Invisible Illusion:
- Clear hanging lamp cable kits+ frosted globe bulbs
- Maintain uniform 60" floor-to-bulb height in hallways
Monochromatic Statements:
- Black cords + matte-black sockets in monochrome kitchens
- Align multiple pendants geometrically (squares, triangles)
Creative Applications Quick-Reference Guide
|
Style |
Best Cord Type |
Ideal Bulb |
Key Space |
|
Cluster Magic |
Uniform color/texture |
Mixed shapes |
Dining rooms, islands |
|
Bohemian Vibes |
Braided natural fibers |
Edison vintage |
Reading nooks, bedrooms |
|
Plant Up lighting |
Damp-rated PVC/rubber |
Warm white LED |
Sunrooms, plant corners |
|
Minimalist Lines |
Clear/black rubber |
Frosted globe |
Hallways, kitchens |
Conclusion
Hanging light wire kits unlock limitless lighting creativity—without complex wiring or high costs. By choosing the right light kit for pendant setups, respecting safety guidelines, and playing with styles, you’ll craft a space that’s both functional and breathtaking.
FAQs
Q: Can I cut a hanging lamp cord to shorten it?
A: Yes! Use wire cutters, strip the ends, and reconnect the socket. Most kits include trimming instructions.
Q: What’s the max weight for a hanging light cord kit?
A: Standard kits hold ≤ 6.6 lbs (3kg). For heavier fixtures, seek reinforced cables.
Q: Are these kits safe for bathrooms/kitchens?
A: Only if labeled "damp-rated" or "wet-rated." Avoid fabric cords in moisture-prone zones.
Q: Can I use smart bulbs with pendant light cords?
A: Absolutely! Ensure your socket type (E26/E12) matches the bulb.
Q: Do I need an electrician to install a hardwired kit?
A: If you’re uncomfortable with wiring, hire a pro. Always follow local electrical codes.


